Drying and curing cannabis is the art of slowly removing moisture to transform a fresh, grassy-smelling harvest into the aromatic, potent flower you're after. This isn't a race. It’s a patient process, usually a 5-10 day slow dry, followed by a weeks-long cure in airtight jars. This final step is absolutely critical for developing flavor and preserving all those precious cannabinoids.
Why the Harvest Is Only Half the Battle
So many growers celebrate the moment they chop their plants down, thinking the hard work is over. The reality? The most make-or-break phase has just begun. These next few weeks will decide if you end up with top-shelf flower or a disappointing batch that smells like lawn clippings.
Freshly harvested cannabis simply isn't ready to be enjoyed. It’s water-logged and full of chlorophyll, which makes for a harsh, unpleasant smoke if you don't handle it right. Learning how to dry and cure is all about mastering controlled dehydration and letting the plant's chemistry do its magic.
The goal is simple: slowly lower the moisture content to let the delicate compounds inside the plant mature. Rushing this is the single biggest mistake you can make, and it will permanently sabotage the quality of your final product.
A proper dry and cure is what elevates your flower, directly impacting:
- Aroma and Flavor: A slow cure is key to preserving volatile terpenes—the compounds that give cannabis its incredible range of smells and tastes. Dry too fast, and they evaporate away.
- Potency: This process helps convert non-psychoactive cannabinoid acids (like THCA) into their active forms (like THC), ensuring you get the full potency from your plant.
- Smoothness: Curing breaks down chlorophyll, the source of that harsh, "green" taste you get from poorly handled flower. A good cure means a noticeably smoother smoke.
- Shelf Life: Bringing the moisture down to the sweet spot prevents mold and mildew from taking hold, allowing you to store your harvest for the long haul without it degrading.
Mastering the Initial Setup
Before you even touch your shears, you need to have your drying space dialed in. The wrong environment can ruin a perfect harvest in just a couple of days. You need a room where you have total control over the conditions.
Think dark, cool, and stable. Light, especially direct sun, is the enemy—it degrades THC and other cannabinoids. Heat is just as bad, causing those precious terpenes to evaporate before you get a chance to enjoy them.
The golden rule for drying is to hang your branches upside down in a dark room kept between 60-70°F (15-21°C) with a relative humidity of 45-55%. This should take about 5-10 days, and you'll know it's ready when the smaller stems snap instead of bending. This process takes the plant from 75-80% moisture down to under 15%, locking in terpenes and preventing mold.
The Great Debate: Wet Trim vs. Dry Trim
One of your first choices after harvest is when to trim your buds. Trimming is just removing the extra sugar leaves and larger fan leaves from the flowers. These leaves don't have many trichomes and can make the smoke harsher. There are two schools of thought on when to do it.
Wet Trimming means you manicure the buds right after you harvest, while everything is still sticky and moist.
- Pros: It’s way easier. The leaves are soft and stick out, making them a breeze to snip. It also helps your buds dry faster since there’s less plant material.
- Cons: That faster drying time can sometimes come at the cost of terpenes. It’s also an incredibly sticky mess—be prepared to clean your scissors constantly.
Dry Trimming is the opposite approach. You wait until your buds have been hanging to dry for 5-10 days before you start trimming.
- Pros: This is the connoisseur's choice. Leaving the sugar leaves on creates a protective layer around the buds during the slow dry, helping to preserve the delicate trichomes. Many growers swear this results in a more aromatic and flavorful final product.
- Cons: It's much more delicate work. The dried leaves are brittle and can easily crumble into the flower, and it can be harder to get that perfectly manicured look.
Honestly, the best method depends on your environment and your goals. If you're in a super humid climate, wet trimming might be a smart move to speed things up and prevent mold. But if you’re chasing maximum quality and have your drying room under control, dry trimming is often the way to go.
And if you're curious about all that fine, sparkly powder that collects on your trim tray, you're looking at kief! Check out our guide to learn more about what is kief and how you can use it.
Navigating the Drying Phase Like a Pro
Alright, you've harvested and trimmed (or decided to dry trim later), but don't pop the champagne just yet. Now comes the real test of a grower's patience: the drying phase. This slow, deliberate process is where your harvest's true character is born, typically lasting anywhere from 7 to 14 days.
If there's one thing to take away, it's this: do not rush this stage. A slow, controlled dry is absolutely essential for preserving those delicate terpenes and cannabinoids you've spent months cultivating. Speeding through it is the fastest way to turn top-shelf flower into something that smells like hay.
The whole game here is about control. You're aiming for a drying space that's dark, cool, and has just a whisper of air circulation. The sweet spot is a temperature between 60-70°F (15-21°C) with a relative humidity (RH) of 45-55%. Think of it like aging a fine wine or cheese—the environment has to be just right for all the magic to happen.
We see this all the time: a grower points a fan right at their hanging branches, thinking it'll speed things up. It's a classic rookie mistake. All that does is flash-dry the outside of the buds while trapping moisture deep inside, which leads to a harsh, unpleasant smoke and kills the aroma. Gentle, indirect airflow is all you need.
Setting Up Your Drying Space
Whether you're using a dedicated grow tent, a spare closet, or an entire room, getting the setup right is crucial. For smaller harvests, something as simple as hanging branches from clothes hangers works beautifully. If you've got a bigger haul, the old-school method of stringing lines across the room—just like a laundry line—is still one of the best.
Did you wet-trim your buds? If so, a tiered mesh drying rack can be a great space-saving option. It works well for individual nugs, but you'll have to remember to gently rotate them every day or so. This prevents them from getting flat spots and helps them dry more evenly.
No matter which method you choose, you'll need a few key tools:
- A Hygrometer: This is non-negotiable. It's the only way to accurately measure temperature and humidity, giving you the hard data you need to keep your environment dialed in. Make sure you place it at the same level as your drying cannabis, not on the floor or way up by the ceiling.
- An Oscillating Fan: Grab a small fan, set it to its lowest speed, and put it on the floor. The crucial part? Point it away from your plants. Its only job is to gently move the air around the room, not to create a wind tunnel.
- A Dehumidifier or Humidifier: Your local climate will dictate which one you need. If you live somewhere damp, a dehumidifier is your best friend for preventing mold. In a very dry, arid climate, you might actually need a humidifier to slow the dry down and keep your buds from turning to dust.
Mastering the Snap Test
So, how do you know when your buds are officially done drying and ready for curing? The answer isn't on a calendar; it's in the classic "snap test." This is a simple, hands-on check that's been the gold standard for growers forever.
After about 5-7 days, start checking your branches daily. Pick one of the smaller, thinner stems that a bud is attached to and try to bend it.
- If the stem bends or folds without breaking, it's still holding too much moisture. Let it hang for another day.
- If the stem snaps cleanly with an audible crack, you're golden. The outside of the flower should feel dry to the touch, but not brittle, and it should still feel a little spongy when you give it a gentle squeeze.
The snap test works because those smaller stems dry out at roughly the same rate as the inside of your buds. When they're brittle enough to snap, it’s a great indicator that the overall moisture level is perfect for starting the cure. Be careful not to over-dry; if your buds feel crispy and just crumble in your fingers, you've gone a bit too far. It's always better to jar them a day early than a day late.
The Art of Curing for Flavor and Potency
Once your buds pass that initial snap test, the real magic begins. The drying part is mostly about getting the water out, but the curing phase? That’s where your flower finds its soul. This patient, hands-on process is what separates decent cannabis from a truly top-shelf product with a complex aroma and an unbelievably smooth finish.
You can think of it like aging a fine wine or whiskey. Curing is a slow, controlled process that lets the sugars and chlorophyll—the stuff responsible for a harsh, grassy taste—break down. At the same time, it preserves all those delicate terpenes that give your strain its unique personality, letting them mature and really pop.
Honestly, this is the most critical step. Nailing the cure makes all your hard work in the garden pay off.
Jarring Your Buds for the Cure
Your most important tool for curing is pretty simple: the airtight glass jar. There's a reason Mason jars are the gold standard for growers everywhere. They create the perfect, controllable micro-environment for your buds to age gracefully.
When you're ready to start, gently place your dried and trimmed buds into the jars. The trick is not to cram them in there. You want to fill the jars to about 75% capacity, leaving a good bit of room at the top. This headspace is essential for letting air circulate and preventing buds from clumping together and trapping moisture, which is a fast track to mold.
This chart breaks down the essential flow, from getting your environment right to the final cure.
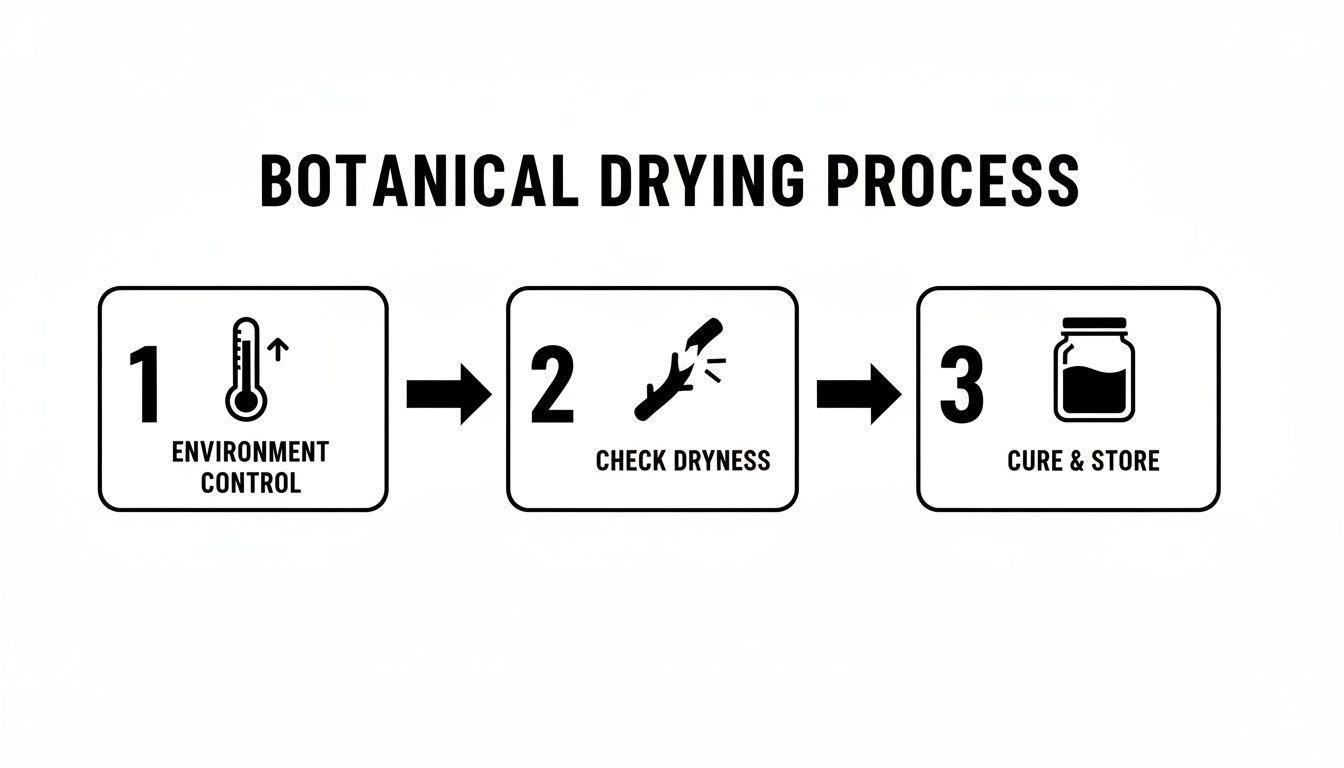
This visual is a great reminder of the simple but vital steps every grower needs to follow for a successful harvest.
Mastering the Art of Burping
Once your buds are jarred up, the most active part of curing starts. We call it "burping." All this means is opening your jars to swap the moist, stale air inside with fresh air from the room.
This does two very important things:
- It lets out the extra moisture that works its way out from the center of the buds, keeping the humidity inside the jar from getting too high.
- It brings in fresh oxygen, which is needed by the good aerobic bacteria that help break down chlorophyll and other harsh compounds.
If you pop a jar and get a whiff of ammonia, that's a major red flag. It means anaerobic bacteria are taking over due to too much moisture, and your buds are at high risk for rot. If that happens, take the lid off for a few hours to let them air out before getting back on your schedule.
Curing is all about patience and paying attention. Your nose is your best friend here. A sweet, complex smell means you're doing great. A grassy or ammonia scent is a sign you need to make an adjustment, and fast.
Your Curing and Burping Schedule
For the first couple of weeks, consistency is everything. Having a set schedule helps you maintain that perfect environment inside your jars. Here's a solid, week-by-week guide to help you manage the burping process and keep an eye on humidity levels as you cure.
A consistent schedule is your best bet for a perfect cure. This table lays out a simple but effective plan to follow.
Sample Cannabis Curing and Burping Schedule
| Curing Week | Burping Frequency | Burping Duration | Target Jar Humidity (RH) |
|---|---|---|---|
| Week 1 | 1-2 times per day | 10-20 minutes | 60-65% |
| Weeks 2-3 | Once every 2 days | 5-10 minutes | ~60% |
| Week 4 | Once per week | 5 minutes | 58-62% |
| Beyond | Once every 2 weeks | 5 minutes | 58-62% |
While many growers consider their flower ready to enjoy after two to four weeks, the flavor and smoothness will only get better with time. Some connoisseurs will cure their flower for six months or even longer to reach that absolute peak of quality.
This schedule isn't just grower wisdom; research backs it up. Studies show that filling jars 75% full and burping them for about 15 minutes daily in the first week, then tapering off, is highly effective. This method has been shown to improve taste scores by as much as 35% in blind tests and keep potency stable for over six months in storage.
If you're curious about how curing affects specific aromatic compounds, our article on the effects of the limonene terpene takes a deeper dive into one of cannabis's most popular terpenes.
Solving Common Drying and Curing Problems
Even with the best-laid plans, things can go sideways during the dry and cure. A sudden change in weather or a simple miscalculation can throw things off, but don't worry—most problems are fixable if you spot them early. Think of this as your field guide to saving the harvest when things don't go exactly to plan.
The best tool you have is your own nose. Seriously. Learning to trust your senses is a skill that separates the good growers from the great ones. The smell of your buds is one of the clearest indicators of what's happening on a microscopic level. If you're getting sweet, complex, and pungent aromas, you're golden. Anything else is a red flag.
What to Do When Buds Dry Too Quickly
This is probably the most common hiccup growers face. You walk into your dry room and find your buds are getting crispy way too fast, often in under three or four days. This is a classic sign that your humidity is too low (dipping below 45% RH) or the room is too warm (creeping above 75°F). When this happens, chlorophyll gets trapped inside, leading to that dreaded hay or fresh-cut grass smell.
If you catch it happening, you can still pump the brakes and slow things down.
- Bump Up the Humidity: A small humidifier can work wonders here. Gently raising the ambient RH will slow down the moisture evaporation from your buds.
- Ease Up on the Airflow: Double-check that your oscillating fan isn't blowing directly on your plants. You're aiming for gentle air circulation in the room, not a wind tunnel.
- Cool It Down: If you can, try to get the temperature back down into that sweet spot of 60-70°F.
What if the damage is already done? If your buds are already overly dry before they even see a jar, you can try to rehydrate them. Tossing them in an airtight container with a 62% RH humidity pack can bring some life back. It won't magically fix a botched cure, but it can make the flower much more pleasant and keep it from turning to dust.
Identifying and Handling Mold or Mildew
Mold is every grower's worst nightmare and the single biggest threat to your entire harvest. It absolutely loves high humidity (anything above 65% RH) and stagnant, still air. The first clue is usually a musty, damp basement smell. Look closer, and you might see white, fuzzy patches or even grayish, web-like stuff on your buds.
Crucial Safety Warning: If you find mold, you have to throw out the affected buds. No exceptions. Do not try to smoke it, cook with it, or process it in any way. Inhaling mold spores can cause serious respiratory infections and other health problems. It is never worth the risk.
Prevention is always the best medicine. Keep that drying room humidity dialed in between 45-55% and make sure you have good, gentle airflow. Just as important, give your hanging branches plenty of personal space so they aren't touching—this is a key step in stopping mold before it ever gets a chance to start.
The Ammonia Smell and Trapped Moisture
You pop open a curing jar, and instead of that beautiful cannabis aroma, you're hit with a sharp, ammonia-like smell. That's a huge warning sign. This odor comes from anaerobic bacteria, which start having a party when you've jarred up buds with too much moisture still trapped deep inside. In short, your flower is starting to decompose from the inside out.
Don't panic—you can usually fix this. Immediately dump the jar's contents onto a clean, dry surface like a piece of cardboard or a brown paper bag. Spread the buds out into a single layer and let them breathe for a few hours. If the problem feels severe, you might even need to let them sit out for a full day.
Once they feel noticeably drier to the touch, put them back in the jar. Now, for the next few days, you need to be aggressive with your burping schedule. Open those jars up three or four times a day to give all that trapped moisture a path to escape. This should get the cure back on track before any real damage is done.
Proper Storage for Long-Term Freshness
You did it. You successfully dried and cured your cannabis, turning a raw harvest into a potent, aromatic final product. Now for the final mission: preserving that quality for as long as possible.
Proper storage is the last, crucial piece of the puzzle. It’s all about protecting your flower from its four main enemies, which work together to degrade the cannabinoids and terpenes you’ve worked so hard to develop.
Defeating the Four Enemies of Preservation
Your perfectly cured flower is vulnerable. A few key environmental factors can strip away potency, ruin the flavor, and turn your top-shelf stash into a disappointing experience if you let them.
- Light: Direct UV exposure is the fastest way to break down THC and other cannabinoids. Always keep your stash in the dark.
- Heat: Warm temperatures cause those precious terpenes to evaporate, robbing your flower of its signature smell and taste. A cool, stable spot is essential.
- Humidity: Too much moisture is an open invitation for mold and mildew. Too little will make your buds brittle and harsh to smoke.
- Oxygen: Overexposure to air speeds up the degradation process, breaking down all those essential compounds you want to preserve.
Think of long-term storage as simply extending the curing process. You're creating a stable, controlled environment to pretty much halt aging and lock in that peak quality you achieved.
Choosing the Right Containers
The container you pick makes a massive difference. While it’s tempting to just toss your flower in a plastic baggie, that’s one of the worst things you can do for long-term storage. Plastic creates static that can actually pull trichomes right off your buds, and it's not truly airtight.
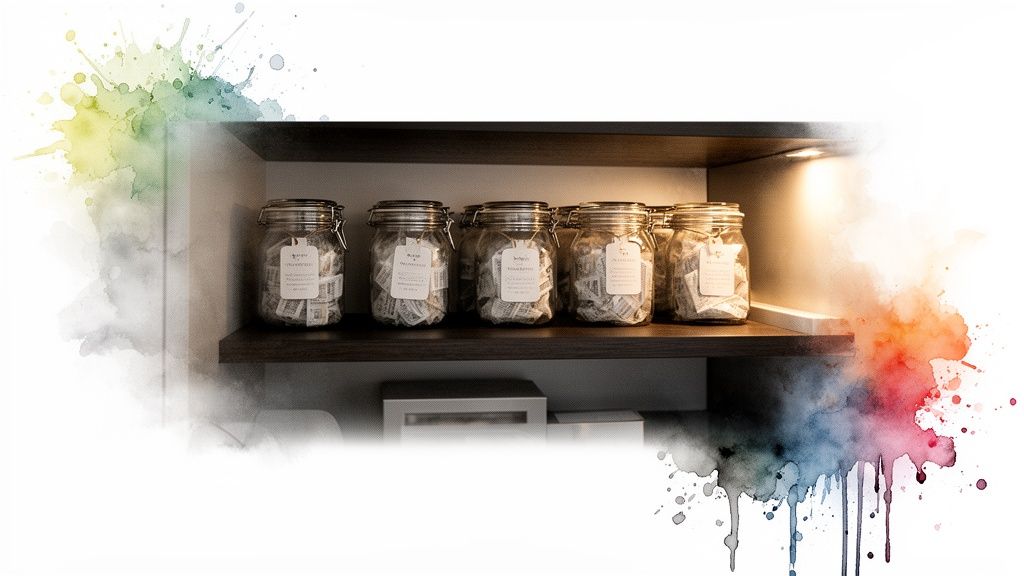
Your best friend for storage is the same one you used for curing: airtight glass jars. Simple Mason jars are cheap, effective, and create a perfect seal against oxygen without affecting the flavor of your flower.
If you want an upgrade, grab some amber or other dark-colored glass jars. These add an extra layer of protection against light, keeping your buds even safer from UV degradation. No matter what jar you use, tuck it away in a cool, dark place like a cupboard or closet, far from any heat sources.
Maintaining Perfect Humidity for Months
Even inside an airtight jar, humidity levels can shift. The secret to long-term freshness is keeping the relative humidity (RH) inside that jar stable. This is where two-way humidity packs, like those that maintain 58% or 62% RH, become an absolute game-changer.
These small, inexpensive packs automatically add or remove moisture as needed, keeping your flower in that ideal preservation zone. They stop your buds from getting too dry and crumbly or too moist and moldy. Just toss a pack into each storage jar, and it does all the work for you, preserving the perfect texture, aroma, and potency for months on end.
Properly cured and stored flower can hold onto significantly more of its valuable compounds. A patient process can preserve up to 20-30% more cannabinoids like THC and CBD compared to a rushed job. In a competitive market like California, this attention to detail is what allows top brands like Alien Labs to consistently deliver lab-tested flower with high THC levels. You can learn more about market trends for cannabis equipment on cannabisindustrydata.com.
For a complete breakdown of all the best practices, check out our guide on storing weed to make sure your harvest stays fresh.
Answering Your Drying and Curing Questions
Even the most seasoned grower runs into questions during the final stretch. After all the hard work of cultivation, the drying and curing phase is where the real magic happens, but it can also be a little nerve-wracking. We've been there.
This is your go-to guide for those "what if" moments. We’ve rounded up the most common questions we hear from growers to give you clear answers that will help you nail the final, crucial steps of your harvest.
How Can I Tell If My Cannabis Is Properly Cured?
Knowing when your cure is complete is an art that involves all your senses. It's not just about hitting a date on the calendar; it’s about the flower telling you it's ready through its aroma, feel, and ultimately, how it smokes.
A perfectly cured bud will have a loud, complex aroma that’s true to its strain genetics. That hay or fresh-cut-grass smell from the initial drying phase should be completely gone, replaced by rich, nuanced scents.
Give a bud a gentle squeeze. It should feel dense but slightly spongy, bouncing back a bit. It shouldn't be damp, nor should it crumble into dust. The real test is bending one of the smaller stems within the flower—if it snaps cleanly, the internal moisture is just right.
The ultimate proof is in the smoke. A well-cured flower delivers a remarkably smooth, flavorful hit that isn't harsh on your throat. Pay attention to the ash, too. Properly flushed and cured cannabis usually burns to a clean, light gray or white ash.
Can I Speed Up the Drying or Curing Process?
We get it. The temptation to rush to the finish line after months of waiting is real. But this is one area where patience pays off more than anywhere else. Trying to speed up drying or curing is probably the single biggest mistake a grower can make, and it can ruin an otherwise perfect harvest.
Using heat or blasting your buds with a fan to dry them faster will have a disastrous effect on quality. This quick-drying method traps chlorophyll in the plant material, locking in a harsh, grassy flavor that you can never get rid of. Worse, it causes the delicate terpenes—the compounds responsible for flavor and aroma—to evaporate into thin air, leaving you with bland, one-dimensional flower.
Curing is a slow, methodical biological process. The enzymatic reactions that break down harsh compounds and refine the flavor profile simply can't be rushed. These weeks are what separate good cannabis from truly exceptional cannabis. Slow and steady wins this race, every time.
What Happens If I Over-Dry My Buds Before Curing?
Over-drying is a common hiccup. It happens when buds lose too much moisture during the hang-dry, often becoming brittle and dropping below 55% RH before you've even had a chance to jar them up. This is a problem because curing relies on a specific amount of moisture inside the bud to keep those crucial enzymatic processes going.
Once a bud is too dry, those processes grind to a halt. This can permanently trap that harsh taste and prevent the full spectrum of flavors from developing. No amount of curing can fully reverse it.
While you can't truly restart a stalled cure, you can reintroduce some moisture to make the buds more enjoyable to smoke. Here are a couple of popular methods:
- Humidity Packs: This is the easiest and most reliable option. Just toss your over-dried buds into an airtight jar with a two-way humidity pack (a 62% RH pack is standard). It will gently rehydrate the flower over a couple of days.
- Fan Leaf Method: An old-school trick is to add a fresh cannabis fan leaf to the jar. The moisture will transfer from the leaf to the buds. Just make sure to check it every few hours and remove the leaf once the buds feel right to avoid adding too much moisture and risking mold.
Just remember, rehydrating is a recovery mission, not a perfect fix. It will improve the texture and smoke, but some of the nuanced flavor and smoothness that an uninterrupted cure provides will likely be lost.
Is It Better to Trim Wet or Dry?
The "wet trim vs. dry trim" debate is as old as cannabis cultivation itself, and honestly, there's no single right answer. The best approach really depends on your specific environment, how much time you have, and what you're aiming for in the final product.
Wet trimming means you trim your buds immediately after chopping down the plant. It's generally faster and a bit easier because the sugar leaves are still hydrated and stick out, making them easy to snip for that perfectly manicured look. This method also speeds up the drying time, which is a huge plus if you're growing in a humid climate where mold is a constant worry.
Dry trimming, on the other hand, involves waiting to trim until after the flowers have hung to dry for about 7-14 days. Many connoisseurs and craft growers swear by this method. The idea is that leaving the sugar leaves on during the slow dry acts as a protective shield for the delicate trichomes. This is thought to preserve the terpene profile better, resulting in a more aromatic and flavorful flower.
Now that you’ve mastered the art of the perfect cure, you deserve to enjoy the fruits of that labor. At Cannavine, we team up with California's best brands who are just as obsessed with quality as you are. Explore our curated menu for pickup or delivery and taste the difference that patience and expertise truly make.


