It's about way more than just looks—properly cleaning your smoking pipes is probably the single most important thing you can do to unlock the true flavor of your cannabis. A clean pipe delivers that pure, terpene-rich taste you paid for. A dirty one? That just guarantees a harsh, bitter experience.
Why a Clean Pipe Is a Game Changer for Flavor
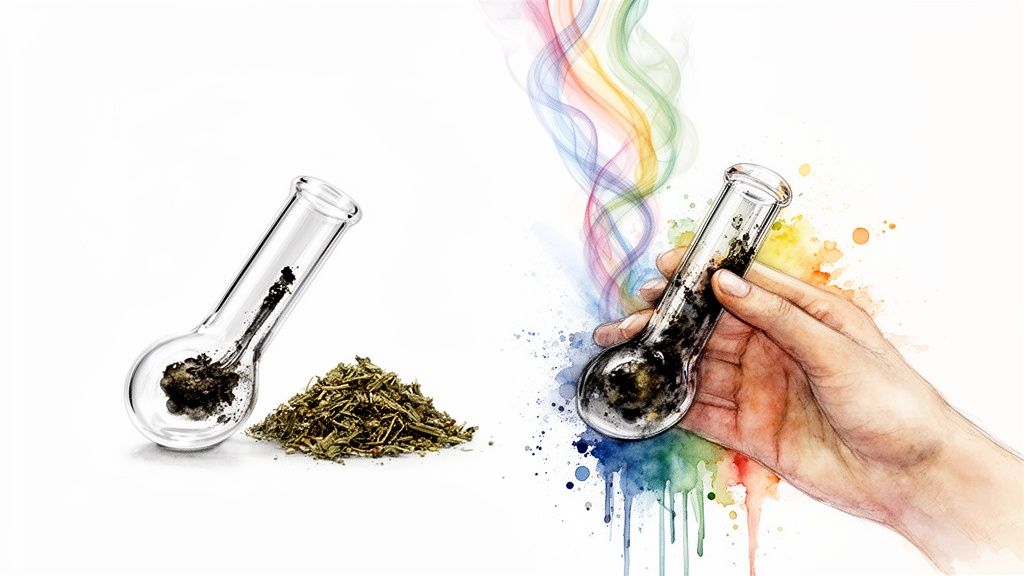
Think of your pipe as the delivery system for some carefully cultivated cannabis. When you invest in a great strain, you're really paying for its unique profile of terpenes—those are the aromatic compounds that give it a distinct smell and taste. A dirty pipe, caked with old resin and tar, completely hijacks the whole experience.
That gunk introduces a harsh, acrid flavor that totally masks the delicate notes of citrus, pine, or earthiness you should be tasting. Instead of enjoying the clean flavor of your flower, you’re just inhaling the stale, burnt taste of old sessions. Yuck.
More Than Just Bad Taste
A clogged pipe does more than just ruin the flavor; it messes up your entire session. That buildup of residue restricts the airflow, forcing you to pull a lot harder. This usually leads to an uneven, super-hot burn, which can scorch your cannabis and destroy the very cannabinoids and terpenes you're trying to enjoy. A bad burn means wasted product and a less effective experience all around.
The benefits of a pristine pipe are obvious right away:
- Purer Flavor: You get to experience your cannabis exactly as the cultivator intended, with no nasty, interfering tastes.
- Smoother Hits: Clear airflow means cooler, less harsh smoke that's way easier on your throat and lungs.
- Maximum Efficiency: A clean bowl lets your flower burn evenly, ensuring you get the most out of every single pack.
Regular pipe maintenance isn't just a chore; it’s an essential ritual for respecting your cannabis. A clean device ensures every session is as smooth, flavorful, and effective as possible.
This commitment to quality is something you see across the entire cannabis accessories market. This market, which covers everything from high-end glass to essential cleaning supplies, is projected to grow substantially as more and more of us value a premium experience. And proper care is a huge part of this.
At the end of the day, keeping your smoking pipes clean is a small investment of time that pays off big time. It transforms what could be a harsh, disappointing session into a smooth and flavorful one, honoring the quality of your cannabis from the first hit to the last. For those who meticulously choose their strains, learning about proper cannabis drying and curing is just as important.
Assembling Your Essential Pipe Cleaning Toolkit
Keeping your pipe clean shouldn't feel like a chore. With the right gear on hand, it can actually be a pretty simple—even satisfying—process. You don't need a high-tech lab, either. Most of the best cleaning tools are probably sitting in your kitchen or bathroom right now. Putting together a dedicated kit just means you're always ready, whether it's for a quick rinse or a full-on deep clean.
The secret to a sparkling clean pipe comes down to a simple partnership: a good solvent to dissolve the gunk and a mild abrasive to scrub it away. This one-two punch does all the heavy lifting, breaking down that sticky resin without scratching or damaging your piece. It's why the classic combo of isopropyl alcohol and salt has been a go-to for generations.
Solvents and Abrasives
When it comes to solvents, 91% or higher isopropyl alcohol (IPA) is the gold standard, and for good reason. It's chemically perfect for dissolving the tar-like resin that clings to the inside of glass and metal pipes. Anything less than 90% has too much water in it, which really kills its cleaning power.
For the abrasive, you'll want something coarse like sea salt or Epsom salt. Those big, chunky crystals act like tiny little scrubbers, knocking resin loose from the inside of your pipe when you give it a good shake. Finer table salt just dissolves too fast in the alcohol to do much good, so stick with the coarse stuff.
Want to go the all-natural route? You can swap the IPA and salt for a mix of white vinegar and baking soda. The fizzing action helps loosen up the grime, but be prepared to let it soak a bit longer, especially for really dirty pieces.
Specialized Cleaning Tools
While the solvent and salt handle the chemistry, a few extra tools make the physical part of the job way easier. Grabbing these can seriously cut down on cleaning time and leave you with a much better result.
- Pipe Cleaners & Brushes: These are an absolute must for getting into stems, bowls, and any other tight spots. The fuzzy, flexible ones are great for navigating curvy pipes, while stiffer bristle brushes are better for tackling stubborn buildup in straight sections.
- Cleaning Caps or Plugs: If you're cleaning a bong or bubbler, these silicone caps are a total game-changer. They create a perfect, spill-proof seal on all the openings, so you can shake the whole thing vigorously without sloshing dirty alcohol water all over your counter.
- Resealable Plastic Bags: For your smaller hand pipes, a basic zip-top bag is your best friend. Just drop the pipe in with your cleaning solution, seal it up, and you can submerge and shake it to your heart's content.
A quick comparison of professional-grade products and effective household items for keeping your pipes in top condition.
Professional vs DIY Pipe Cleaning Supplies
| Tool or Solution | Professional Option | DIY Alternative | Best For |
|---|---|---|---|
| Solvent | Formula 420 or Randy's Black Label | 91%+ Isopropyl Alcohol | Dissolving tough resin in glass, metal, and ceramic pipes. |
| Abrasive | Abrasive crystals in cleaning formulas | Coarse Sea Salt or Epsom Salt | Scrubbing away loosened residue from interior surfaces. |
| Scrubbers | Specialized hard-bristle pipe brushes | Standard craft pipe cleaners & old toothbrushes | Clearing residue from stems, bowls, and tight corners. |
| Sealers | Resolution Cleaning Caps | Plastic wrap and rubber bands | Sealing openings on water pipes for vigorous, mess-free shaking. |
| Soaking Container | Dedicated cleaning tray or tub | Resealable plastic bags or Tupperware | Submerging smaller hand pipes for a deep soak and shake. |
Ultimately, whether you buy a dedicated kit or pull together items from around the house, the goal is the same.
Having all these items in one spot—like a small box or tray—makes the whole process incredibly efficient. When your tools are organized and within reach, you're much more likely to keep up with regular cleanings, which means better flavor and smoother hits from your favorite pieces.
Mastering Cleaning Methods for Different Pipe Materials
The material your pipe is made from is the single most important factor in deciding how to clean it. You just wouldn't use the same aggressive approach on a delicate wooden pipe as you would on a nearly indestructible metal one. Getting this right is key to keeping your favorite pieces in great shape for years to come.
This chart breaks down the three core parts of any good cleaning process: the solvent that dissolves the gunk, the abrasive that scrubs it off, and the tools you use to get the job done.
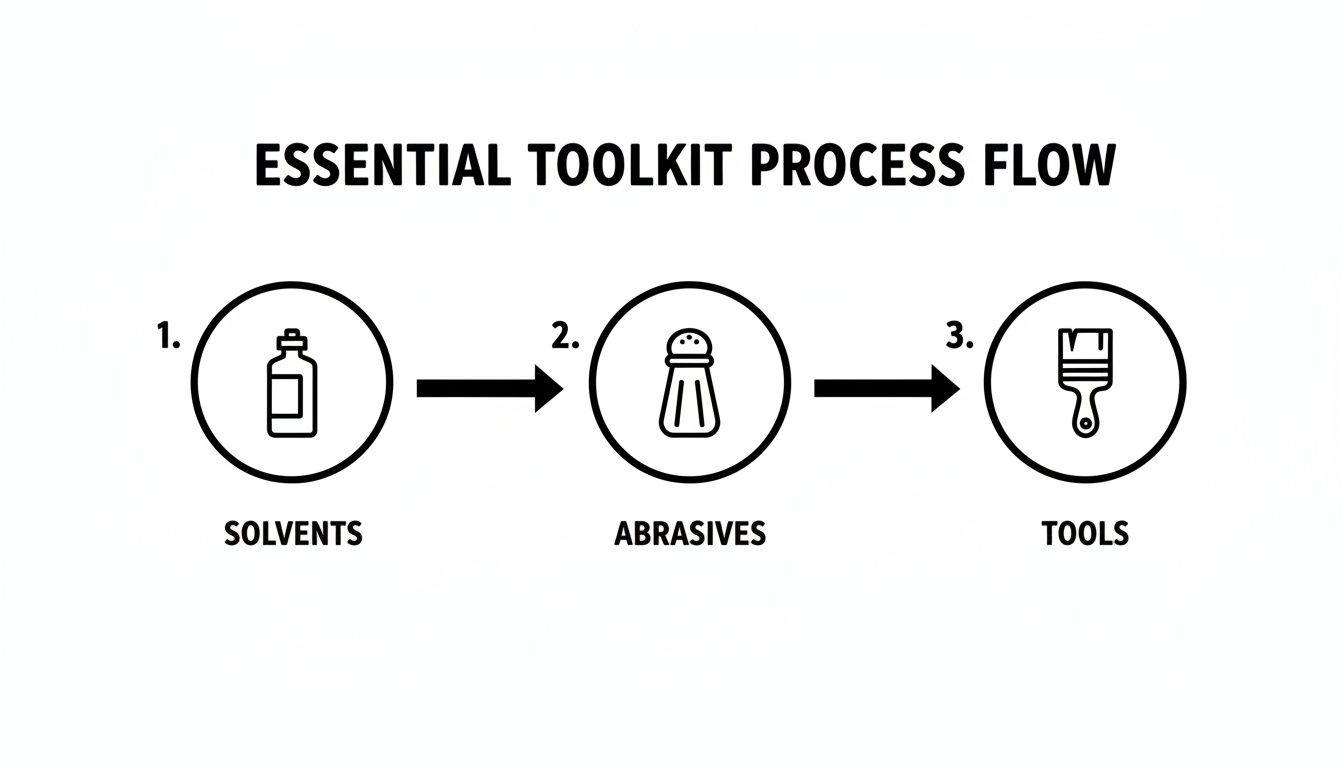
Think of it as a team effort. The solvent loosens the grip of the sticky residue, the abrasive physically scrapes it away, and your tools make sure you can reach every nook and cranny.
Cleaning Classic Glass Pipes
Glass is a fan favorite for a reason—it’s non-porous and pretty tough, which makes it one of the easiest materials to get sparkling clean. There's a reason the old-school isopropyl alcohol (IPA) and salt method is still the gold standard: it just works. The alcohol is a potent solvent that chemically demolishes that sticky, tar-like resin.
To get started, just pop your smaller glass pipe into a resealable plastic bag. If you're cleaning a bigger piece like a bong, you can pour the mix right inside and plug the holes with cleaning caps. Add enough 91% or higher IPA to cover the dirty parts, then toss in a good amount of coarse salt—Epsom or sea salt works great.
Now for the fun part: shake it! Give the bag or bong a vigorous shake for a couple of minutes. The salt acts like a perfect little scrubber, scraping the resin from the glass walls while the alcohol dissolves it away. Once it looks brand new, give it a thorough rinse with hot water and let it air dry completely.
Caring for Wooden Pipes
Wooden pipes, especially those made from classic briar, need a much gentler hand. Harsh liquids like high-proof alcohol are a definite no-go. They can strip the wood of its natural oils, wreck the finish, and destroy the "cake"—that crucial protective layer of carbon that builds up inside the bowl.
For a quick, routine clean, just stick to the basics. Once the pipe has cooled down completely, run a soft pipe cleaner through the stem and shank. This will soak up any leftover moisture and knock out loose debris. A word of caution: never try to take apart a wooden pipe while it’s still warm. You risk warping or cracking the tenon.
If you need a slightly deeper clean, you can barely dampen a pipe cleaner with a tiny bit of a neutral spirit, but never get the wood wet. The goal here is preservation—keep the airway clear without damaging the material itself.
Pro-Tip: Absolutely never soak a wooden pipe or run it under water. This is a fast track to swelling and cracking the wood, which will permanently ruin your pipe. A careful, dry approach is always the way to go.
Handling Durable Metal and Silicone Pipes
Metal and silicone pipes are the tough guys of the smoking world. They're built to handle much more aggressive cleaning methods, so you don't have to be quite as delicate.
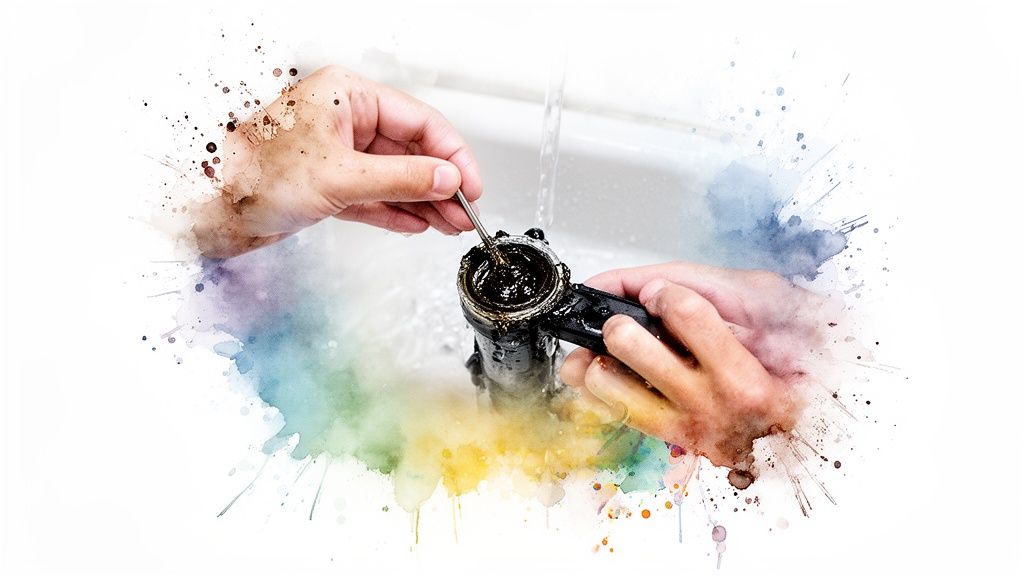
- Metal Pipes: These can usually be taken apart completely, which gives you amazing access to every single part. Feel free to soak the metal pieces in isopropyl alcohol. For really stubborn, caked-on gunk, you can even carefully boil them in water. Just be sure to remove any rubber or plastic o-rings first so they don't melt.
- Silicone Pipes: Silicone is incredibly resilient. One of the coolest cleaning hacks is to just toss your silicone pipe in the freezer for a few hours. The resin will get brittle and hard, and you can often just squeeze the pipe to crack it right off. As a bonus, most silicone pipes are also dishwasher-safe, making for an incredibly easy, hands-off cleaning session.
Whether you're dealing with a simple glass hand pipe or a more complex device, the basic principles are the same. And if you use a variety of smoking accessories, understanding these nuances is helpful. For those curious about other gear, you can learn more about how to properly use a wax pen in our detailed guide.
How to Tackle Stubborn Resin and Tough Clogs
Sometimes, the good old soak-and-shake method just doesn't get the job done. We’ve all been there—a favorite pipe gets forgotten for a little too long, and suddenly it’s caked with hardened resin that feels more like cement. When you hit that point, you’ve got to bring out the heavy-duty techniques.
Before you go all-in, though, a quick pre-rinse can make a world of difference. Just run some warm water (not hot!) through the pipe for a minute or two. This simple step helps soften up that outer layer of gunk, giving your cleaning solution a much better shot at working its magic.
Quick heads-up for glass owners: never use boiling water. That drastic temperature change—what’s known as thermal shock—is a surefire way to crack or even shatter your piece. Stick with warm tap water; it’s all you need to get things started safely.
Breaking Up Major Blockages
If your pipe is so clogged that you can't even get air through it, you'll need to do some manual labor first. It's a super common problem, especially in the tight corners of a hand pipe's neck or stem. The trick here is to be gentle and avoid scratching up the inside.
A dedicated poker tool or even a metal dab tool is perfect for this. Carefully work the tool into the airway and gently chip away at the blockage. You aren't trying to scrape the whole thing clean just yet—the goal is just to create a small channel so your cleaning solution can get inside and do the real work.
Advanced Cleaning Tactics for Tough Grime
Okay, once you've cleared a path, it's time to level up your cleaning game. For those really nasty situations, a bit of warmth is your best friend.
Warm Up Your Solvent: Take your sealed bag or container of isopropyl alcohol and place it in a bowl of hot tap water for about 10 minutes. Gently warming the alcohol seriously boosts its power to dissolve resin. Just remember, never microwave alcohol—it’s extremely flammable.
Go for a Second Soak: If you've done one round of shaking and there's still stubborn residue, don't be afraid to do it again. Drain out the dirty liquid, then refill with a fresh batch of warm IPA and salt. Let it sit for another hour, or for the absolute worst-case scenarios, let it soak overnight.
This one-two punch of physically breaking up the clog and then hitting it with a supercharged solvent soak will take care of over 95% of stubborn resin issues. It's the go-to method for a reason.
For those really complex pieces with percolators or chambers that are impossible to reach, try a high-pressure flush. After you’ve finished soaking, cover the mouthpiece with the palm of your hand and hold the pipe firmly under a warm tap. Let the water pressure build up for a second before you release your hand. This forces a powerful jet of water through the piece, blasting out any leftover gunk.
Building a Simple Pipe Maintenance Routine
The secret to avoiding those marathon cleaning sessions is simple: consistent upkeep. Building a maintenance routine turns a huge chore into a few small, easy habits. This isn't just about keeping your pipe looking good; it's about making sure every hit tastes fresh and extending the life of your piece.
Think of it as a small investment in a better smoking experience. A little attention right after a session stops sticky resin from hardening into a nightmare later. This is really the difference between a pipe that performs beautifully and one that just tastes harsh and dirty.
Creating a Practical Cleaning Schedule
Your perfect routine really just depends on how often you smoke. A daily smoker is going to need a different schedule than someone who only lights up on the weekends.
Here’s a practical schedule you can tweak to fit your own habits.
- After Each Session: This is the big one. As soon as your pipe is cool enough to handle, dump out the ash and any leftover debris. A quick rinse with hot water does wonders, especially for bongs, washing away fresh gunk before it even has a chance to set.
- Weekly: Time for a light deep clean. For most people, a quick 15-minute soak and shake with isopropyl alcohol and salt once a week is all it takes to keep major buildup from happening.
- Monthly: This is your chance to hit the reset button with a full, thorough cleaning. It might mean a longer soak, getting into every corner with pipe cleaners, and making sure the whole piece is spotless.
If you build just one habit, make it this: use fresh water in your water pipe for every single session. Stale water tastes terrible and quickly becomes a breeding ground for bacteria. Clean water is the easiest and most effective step you can take.
Pro-Tips for Pristine Pipes
Beyond a basic schedule, adding a few expert tricks can make maintenance even easier. Wiping out the bowl with a cotton swab right after you use it, for example, is a great way to prevent that hard, black carbon ring from forming.
For water pipes, changing the water isn't just about taste—it's about health. Stagnant water is the perfect environment for mildew to grow. You can learn more by checking out our guide on spotting and avoiding mildew on cannabis, which gets into why a clean environment is crucial for your flower and your tools.
Bottom line? A clean pipe is a healthy pipe.
Common Questions About Cleaning Smoking Pipes
Even with a solid cleaning routine, you’re bound to have questions. You want to make sure you're not accidentally damaging your favorite piece, after all. Over the years at Cannavine, we've heard just about every question in the book, so we’ve put together the most common ones to help you clean with confidence.
Getting the fundamentals down is the best way to make sure your gear stays in pristine shape for years to come.
Can I Use Boiling Water to Clean My Glass Pipe?
This is probably the number one question we get, and the answer is a hard no. It seems like a good idea in theory—hot water is a great cleaner—but it's incredibly risky for your glass. The sudden, extreme temperature jump creates something called thermal shock.
That intense stress can easily cause your glass pipe to crack or, worst-case scenario, shatter into pieces. A much safer bet is to use hot tap water for a preliminary rinse. It's warm enough to loosen up fresh gunk without putting your pipe in danger, prepping it perfectly for a deeper clean with isopropyl alcohol and salt.
How Often Should I Clean My Pipe?
Honestly, this really boils down to how often you use it. There isn't one perfect answer for everyone, but we have a pretty solid guideline you can follow.
- Daily Users: If you're a daily smoker, giving your pipe a quick clean every 1-3 days is a great habit. It can be as simple as a hot water rinse. Then, aim for a full deep clean with a solvent at least once a week to keep major buildup from happening.
- Occasional Users: If you only break out your pipe a few times a week, a deep clean every couple of weeks or once a month will probably do the trick.
Your pipe will tell you when it’s time. If your flower starts tasting harsh or the draw feels tight, that’s your cue. Listen to your gear—it knows what it needs.
Is It Safe to Use Household Cleaners Like Bleach?
Absolutely not. This is a big one, so please take it seriously. Common household products like bleach, ammonia-based cleaners, or even scented soaps are packed with toxic chemicals that you should never, ever heat up and inhale.
Even if you rinse your pipe really well, tiny amounts of residue can cling to the inside. The next time you light up, those chemicals can vaporize and go straight into your lungs, which is incredibly harmful. Stick with the safe and proven methods: 91%+ isopropyl alcohol and coarse salt, or grab one of the many cleaning solutions made specifically for smoking gear.
What Is the Best Way to Get Resin Smell Off My Hands?
That sticky, stubborn resin scent has a knack for sticking around long after you’ve finished cleaning. Soap and water alone usually don't cut it because resin isn't water-soluble. The key is to dissolve the oily, sticky stuff first.
A great trick is to rub a little bit of oil—coconut, olive, or even regular cooking oil—all over your hands. Massage it in to break down the resin, then wash up with soap and warm water. If you need something stronger, a small amount of isopropyl alcohol will also work, but make sure you wash and moisturize your hands well afterward because it’s very drying.
At Cannavine, we believe a clean pipe is essential for a great cannabis experience. If you need to stock up on cleaning supplies or want to find the perfect flower to enjoy in your sparkling clean piece, you can browse our full menu online. We’ve got you covered with in-store pickup and delivery across Northern California.


